Overview
CosmWasm ecosystem allows the development of smart contracts that are secure, composable, and interoperable. In this ecosystem, deploying a contract involves two main steps: storing the code on the blockchain and then instantiating a contract from this code. Storing the code allows it to be reused multiple times, while instantiation creates a specific instance of the contract with its own state. Before the launch of Celatone, developers in the CosmWasm ecosystem typically stored code and instantiated contracts through Command Line Interfaces (CLI), a process that can be complex and less intuitive compared to modern UIs. Celatone addresses this challenge by offering a more user-friendly interface, simplifying these processes and making them more accessible to new users.Upload Wasm to Store Code
In the smart contract blockchain ecosystem, policies for storing code on testnet and mainnet can vary. Generally, anyone is allowed to store code on both networks, but some app chains restrict mainnet code storage to whitelisted addresses, ensuring higher security and stability. The testnet remains open for all, allowing broader development and testing. This differentiation helps everyone test their developed smart contract in risk-free playground environment.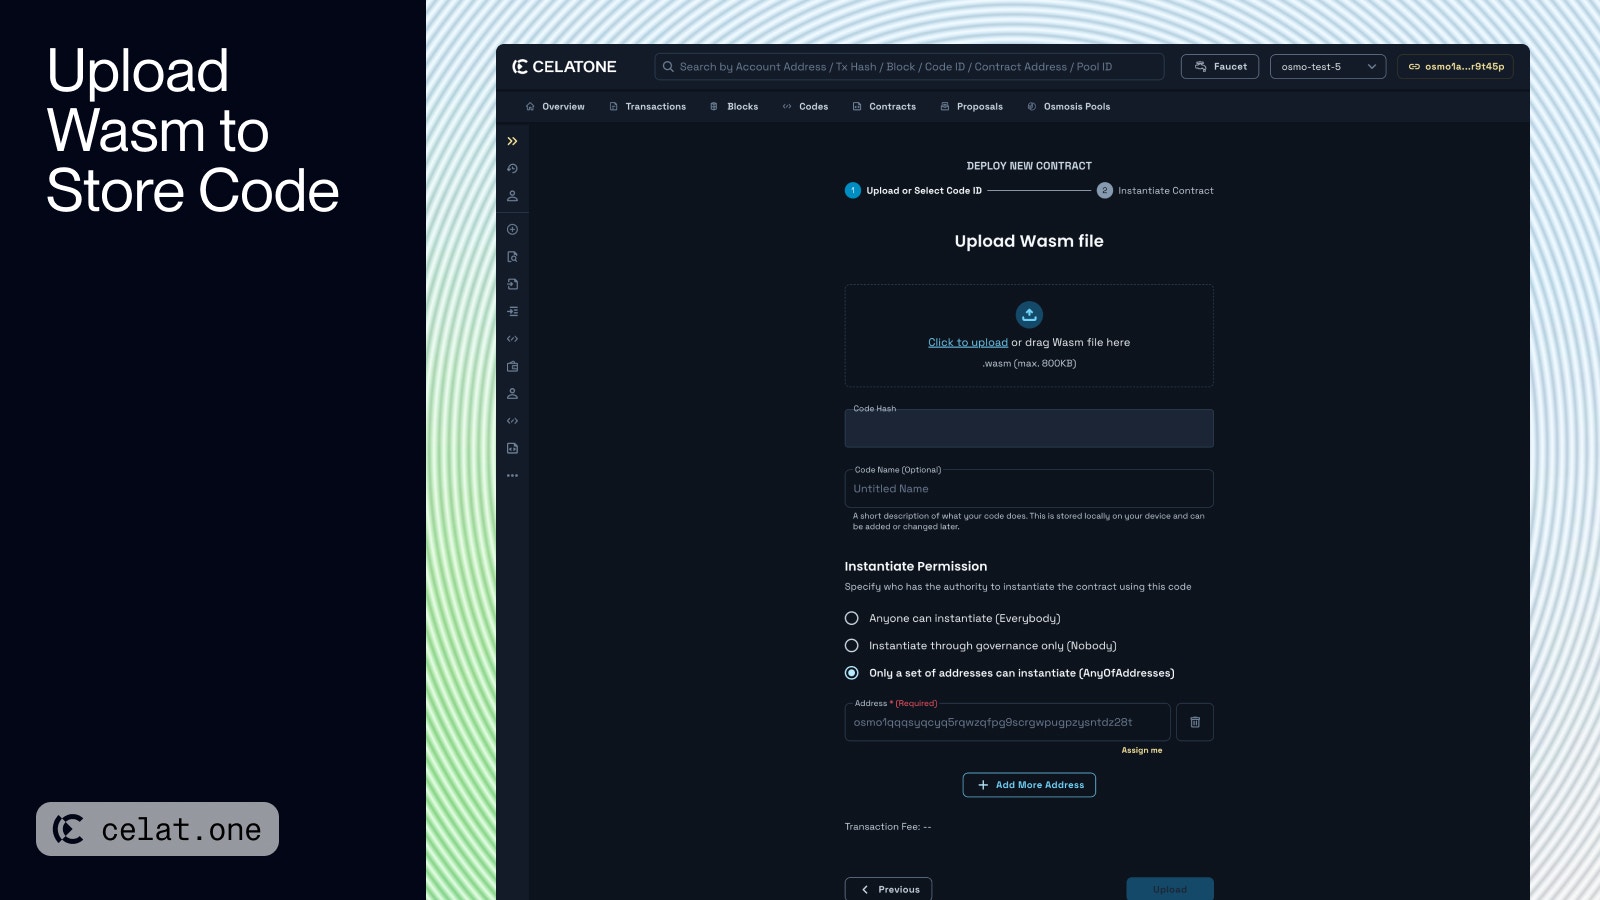
- Preparing the compiled Wasm file of your smart contract and native token in your wallet to pay for transaction fee.
- Connect your wallet to Celatone, by clicking the “Connect” button at the top-right of the screen
- Click on the “Deploy Contract” at the Developer tools section in the left side bar navigation
- Select “Upload New Wasm File”
- Drag & Drop a single Wasm file to the box, or click at the box to select your file to upload.
- The system will display selected file’s Code Hash. So that you can ensure if the selected file is the correct one or use it other ways.
- You can provide the Code Name to remind yourself about the uploading code. The name will be stored locally on your device.
- You need to select the Instantiate Permission to specify who has the authority to instantiate the contract using this code.
- Click the “Upload” button. Your connected wallet will ask you to approve the transaction with displayed gas fee.
- If the transaction is submitted properly. The success screen will display the assigned Code ID to your stored code, which is used for contract instantiation.
- In case you have JSON Schema for the code, you can attach it through “Attach” button. Otherwise, you can click “Skip and proceed to instantiate” as well. See more about JSON Schema
Remark: If you choose a permissioned CosmWasm network, not everyone is allowed
to store code. Consequently, you may not be able to continue beyond step 4, as
the option will be disabled.
Instantiate Contract from Code
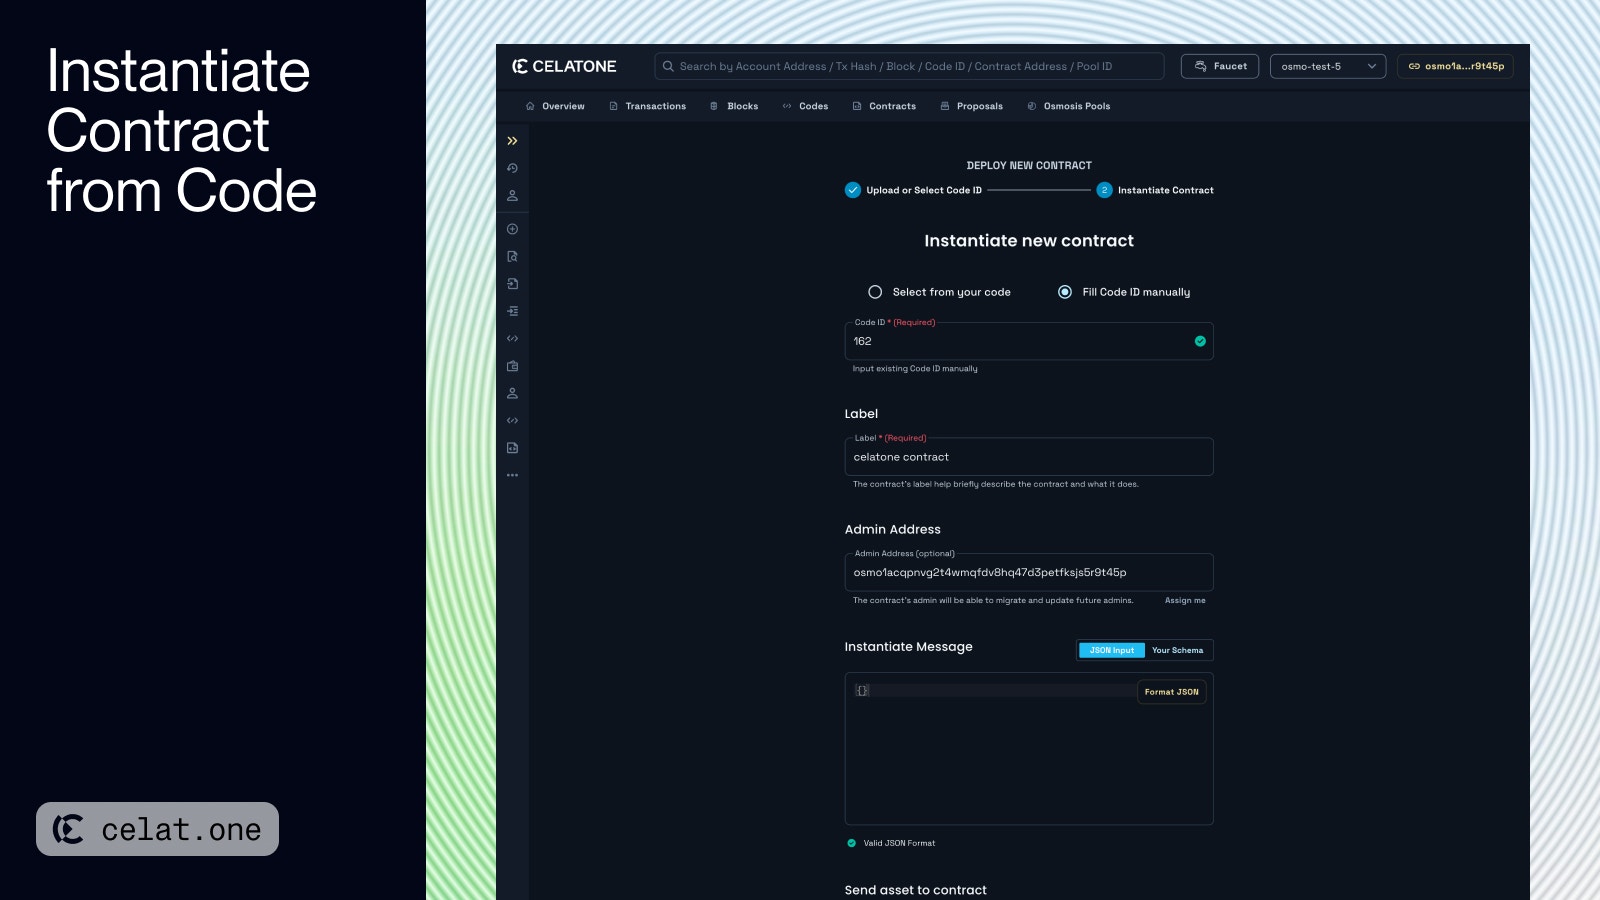
- If you are just recently uploaded the code, the code will be selected automatically so you can skip this step. Otherwise, you can select the code to instantiate contract in two ways
- Provide the necessary information for instantiation
- Review your provided information, the system will evaluate if all the inputs are valid with expected transaction fee display.
- If the transaction is submitted properly. The success screen will display the assigned contract address to your newly instantiated contract. You can view the Contract Details to ensure things work properly or go straight to Execute or Query the Contract
- Every of your instantiated contract through the connected wallet will be displayed in “Instantiated by Me” which located in the “This Wallet” section of the left sidebar. You can assign Contract Name, Description, Tags, and Contract Lists you want it to be displayed on.